Physical Address
304 North Cardinal St.
Dorchester Center, MA 02124
Physical Address
304 North Cardinal St.
Dorchester Center, MA 02124

Explore WWI battlefields of the Somme on this private 9-hour Australian and New Zealand tour from Lille or Arras, including memorial visits and museum entry.

The Australian and New Zealand Battlefield Day Tour in the Somme offers a comprehensive, private 9-hour experience that brings history vividly to life. Priced at $445.98 per person, this tour departs from Arras or Lille, with round-trip transportation included, making the day hassle-free. The tour is highly rated, receiving a perfect 5.0 out of 5 from eight reviews, highlighting its quality and informative guides.
This tour is ideal for history enthusiasts who want an in-depth look at the Western Front’s key Australian and New Zealand sites. It includes local transport, lunch, and entrance fees, offering a convenient and well-rounded day. While the tour involves a moderate physical effort, the well-organized schedule ensures an engaging experience with minimal logistical stress.
Planning more time in Arras? We've covered other experiences worth considering.
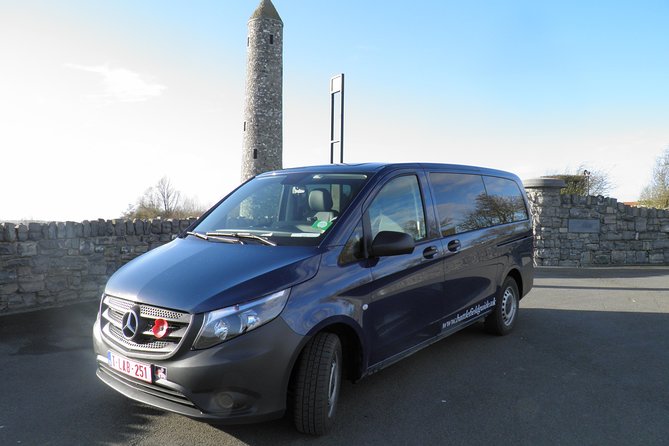
This tour begins at 8:30 am, with pick-up from your hotel or designated meeting point in either Lille or Arras. The air-conditioned private vehicle ensures comfort during the approximately 9-hour day. The inclusive round-trip transportation removes the hassle of navigating public transit or finding parking, making it ideal for those seeking convenience.
Travelers should be prepared for a day of moderate physical activity, including walking around memorials and battle sites. The service is tailored for small groups, providing an intimate experience and personalized attention from the guide. The tour’s flexibility and private nature mean your party enjoys a more tailored and engaging journey through history.
The tour features a series of carefully chosen stops that bring the stories of WWI to life. Each location offers a unique insight into the sacrifices and military strategies of the Australian and New Zealand forces.
The day starts at École Victoria, where the reconstructed school is a poignant reminder of the civilian toll during WWI. Australian school children helped rebuild this site, symbolizing resilience and remembrance. The 15-minute visit is free of charge, providing an immediate connection to the local community’s efforts to honor history.
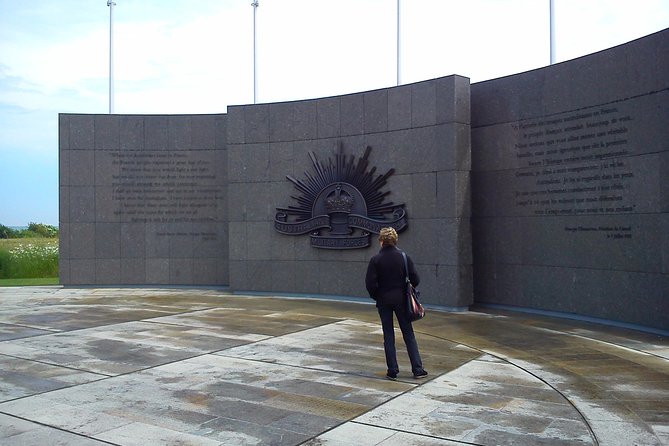
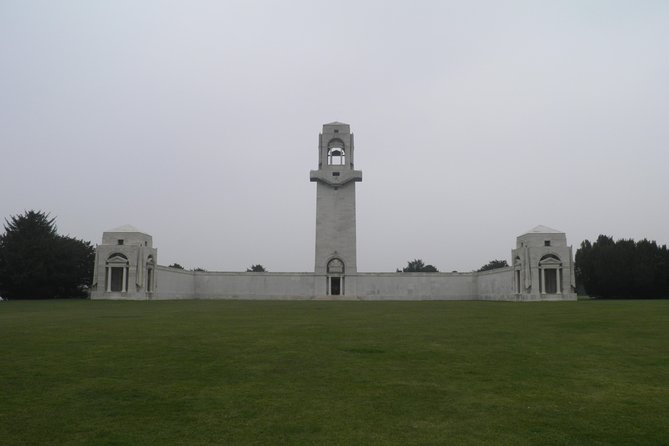
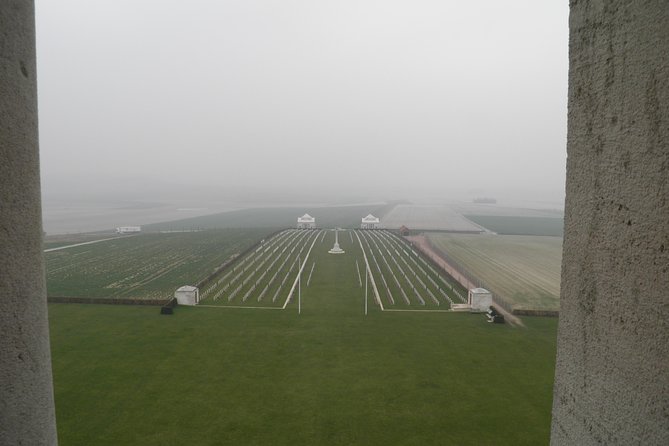
Next, the Australian National Memorial takes center stage. It bears the 11,000 names of Australians who died in France and have no known graves. Visitors can climb the tower for a panoramic view of the battlefields, offering context for the scale of the conflict and the sacrifices made. This stop lasts about 1 hour and 30 minutes, providing ample time for reflection and photos.
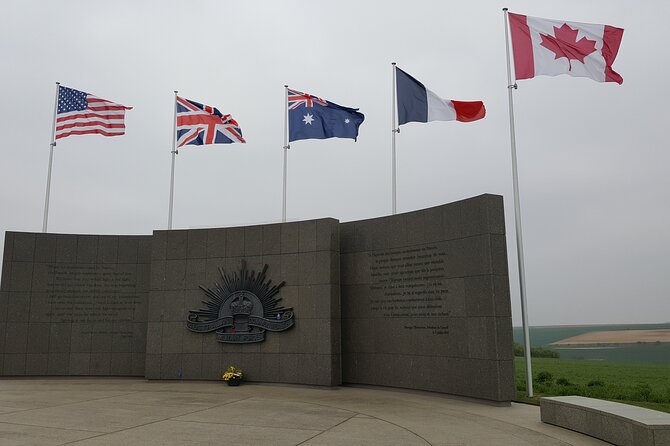
Standing on what was once German lines, the Australian Corps Memorial marks the launching point of Sir John Monash’s assault on 4 July 1918. This 30-minute stop offers a tangible sense of the battlefield strategy and the terrain that shaped the fighting.
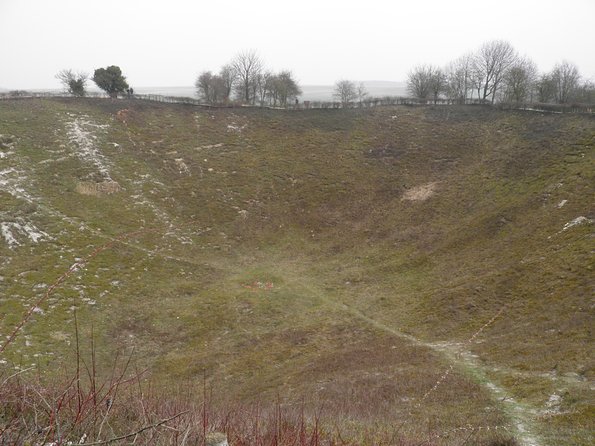
A quick 15-minute visit to the Lochnagar Crater offers a striking visual of one of the largest man-made craters from WWI. This site exemplifies the scale of underground mining and explosion tactics used during the war.
In Pozières, the tour visits the Pozières Memorial as well as notable sites like the Moo Cow and Windmill Memorials. These sites, in operation for about 1 hour, highlight the Australian Division’s significant role in the Battle of the Somme.
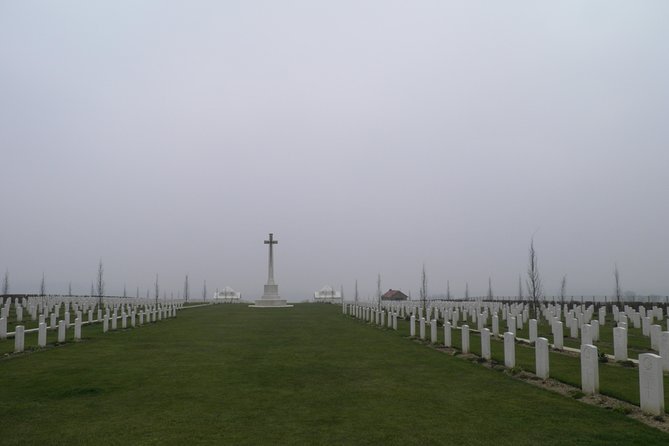
The Caterpillar Valley Memorial and Cemetery serve as a key focus for New Zealand visitors, with a 1-hour stop. The site commemorates New Zealand forces and features the Caterpillar Cemetery and memorials, deepening understanding of New Zealand’s contributions.
In Longueval, the New Zealand Forces Memorial and Caterpillar Valley are covered in a 30-minute visit, emphasizing the shared history of Allied forces. The Historial de la Grande Guerre – Musee de Thiepval provides a 2-hour rundown, with entry included, showcasing memorials and exhibitions about WWI.
This tour provides all taxes, fees, and handling charges upfront, with lunch and bottled water included to keep you refreshed. The private transportation ensures a comfortable ride, and entry to the museum at Thiepval is part of the package. This setup minimizes extra expenses and simplifies planning, focusing on an immersive and relaxed experience.
The tour operates with only your group and a guide/driver, ensuring personalized attention and flexibility. The confirmation is immediate upon booking, and the start time is fixed at 8:30 am. Children are welcome but must be accompanied by an adult, and service animals are allowed.
Review comments consistently highlight the knowledgeable and engaging guides, especially mentioning Claude. Guests appreciate how guides provide in-depth context, making the history vivid and accessible. The tour’s air-conditioned vehicle is especially valued in warm weather, maintaining a comfortable environment during the day.
The tour requires moderate physical fitness due to walking at various stops and museums. It is a private tour, so the experience is tailored but may not suit those seeking a larger group setting or more flexible timing.
This experience stands out for its full-day, private format, comprehensive itinerary, and inclusion of lunch and museum access. It offers an in-depth focus on Australian and New Zealand contributions to WWI, appealing especially to those with specific interests in these nations’ military history.
The 9-hour private tour offers an informative and respectful journey through significant WWI sites on the Western Front. Its expert guides, well-curated stops, and inclusive amenities make it a highly recommended choice for history enthusiasts and those seeking a meaningful, stress-free day of exploration.
While it requires some physical effort and is tailored for smaller groups, the value of personalized attention and detailed storytelling makes it worth considering. This tour suits travelers who want a thorough, respectful look at the sacrifices made by Australian and New Zealand soldiers, set within the broader context of WWI.
“Claude is extremely knowledgeable and took us to some great places. We really enjoyed our day. Highly recommended.”
What is included in the tour price?
The tour price covers all taxes, fees, handling charges, lunch, bottled water, private transportation, and museum entrance fees.
Are children allowed on this tour?
Yes, children can participate but must be accompanied by an adult.
What is the duration of the tour?
The tour lasts approximately 9 hours, starting at 8:30 am.
Is the tour suitable for people with mobility issues?
Travelers should have moderate physical fitness, as some walking and standing at memorials and museums are involved.
Can I cancel the tour?
Yes, free cancellation is available if canceled at least 24 hours in advance.
How large are the groups?
This is a private tour, so only your party participates, ensuring a personalized experience.
What stops are included in the itinerary?
Stops include École Victoria, Australian National Memorial, Australian Corps Memorial, Lochnagar Crater, Pozières Memorial, Caterpillar Valley Memorial, Longueval, and the Thiepval Museum.
How knowledgeable is the guide?
Guests consistently praise Claude and other guides for their expertise and engaging storytelling.
Is lunch included?
Yes, a lunch is provided as part of the tour package.
What should I bring?
Comfortable shoes and weather-appropriate clothing are recommended, given the outdoor stops and walking involved.